Austin Permaculture

An Austin area journey in developing an abundant and sustainable landscape.


Leave a comment

Swale Contruction

What is a swale?

A swale is a mainframe construct used in permaculture systems.  It is a water harvesting and tree-growing system.  It consists of 3 main parts:  A berm, a trench and a back cut.  A swale is placed in a strategic location in the landscape to allow it to capture as much water as possible.  The way this is achieved is by placing the swale on contour.  That means the swale is level all the way across.  The concept of placing something on contour is difficult to understand at first.  Think of a contour map that shows elevations.  You probably remember these from your Geology class when you were in school.  Each one of the lines on a contour map denotes a specific elevation.  As you follow these lines on the map they are the same elevation along that same line.  You could place a swale on one of those lines this would mean your swale would be level or on contour.

A swale is placed on a slope.  This is where you start thinking in 3D.  There are no set parameters or size restrictions per se.  Size is based on what else interacts with the swale.  For example, I have a large amount of space between the swale I constructed and the one I wish to construct.  The space between the two swales  is where I will have a paddock grazing area.  Other factors may be limitations on how deep you can have your base and the maximum height of your trees that you plant.  Tree shading  may cause you to add distance to another swale.

Swale Basics:

Swale Basic

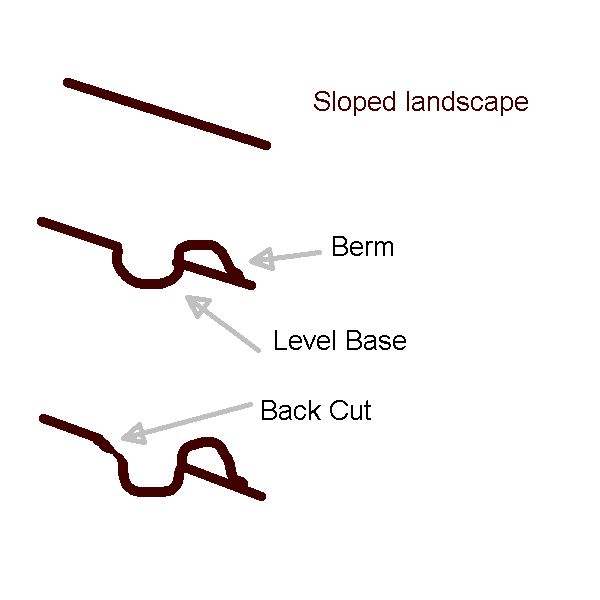
The base of the swale is the trench.  It is the most important that this be as level as possible.  Think of spilling water on a counter top.  The water spreads along the counter since it is level.  Water that enters the swale will do the same thing.  At first the water will stop and then spread out and last, soak in.   The berm is the material removed from the level base.  This is placed on the downhill side and planted with trees or living mulch.  When water enters the swale from the uphill side it fills the swale and gravity pulls it under the berm hydrating the land on the downhill side.  Adding a back cut will ease erosion.  You can also plant into the back cut.  It is best to limit it to a cover crop.  There are hard rules in permaculture so if you wanted to plant trees in the back cut you can as well.

The right tool for the job:

I rented a mini-excavator:

mini excavator

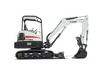
The bigger the project, the bigger the machine you will need.  This will speed things up too.  I had the option of an 18″ or a 12″ bucket.  I chose the 18″.  The bucket had teeth on it so it was able to cut the ground better, but left the back cut and the level base with a rougher look than a smooth bucket.  You will see in the pictures.

Step 1:

Mark your swale with paint and flags.  As you move earth you will lose some reference points.  It is better to have as much help as possible.  I marked the location of my swale using a laser level.  I will go into laser levels in another post.  Basically your starting point with your level is where you calibrate your level.  From there you take readings to match the elevation from your starting point.  As you go along the landscape your swale might bend and turn.  Take many readings as you can steer your swale if your terrain is bumpy.

Swale 1a

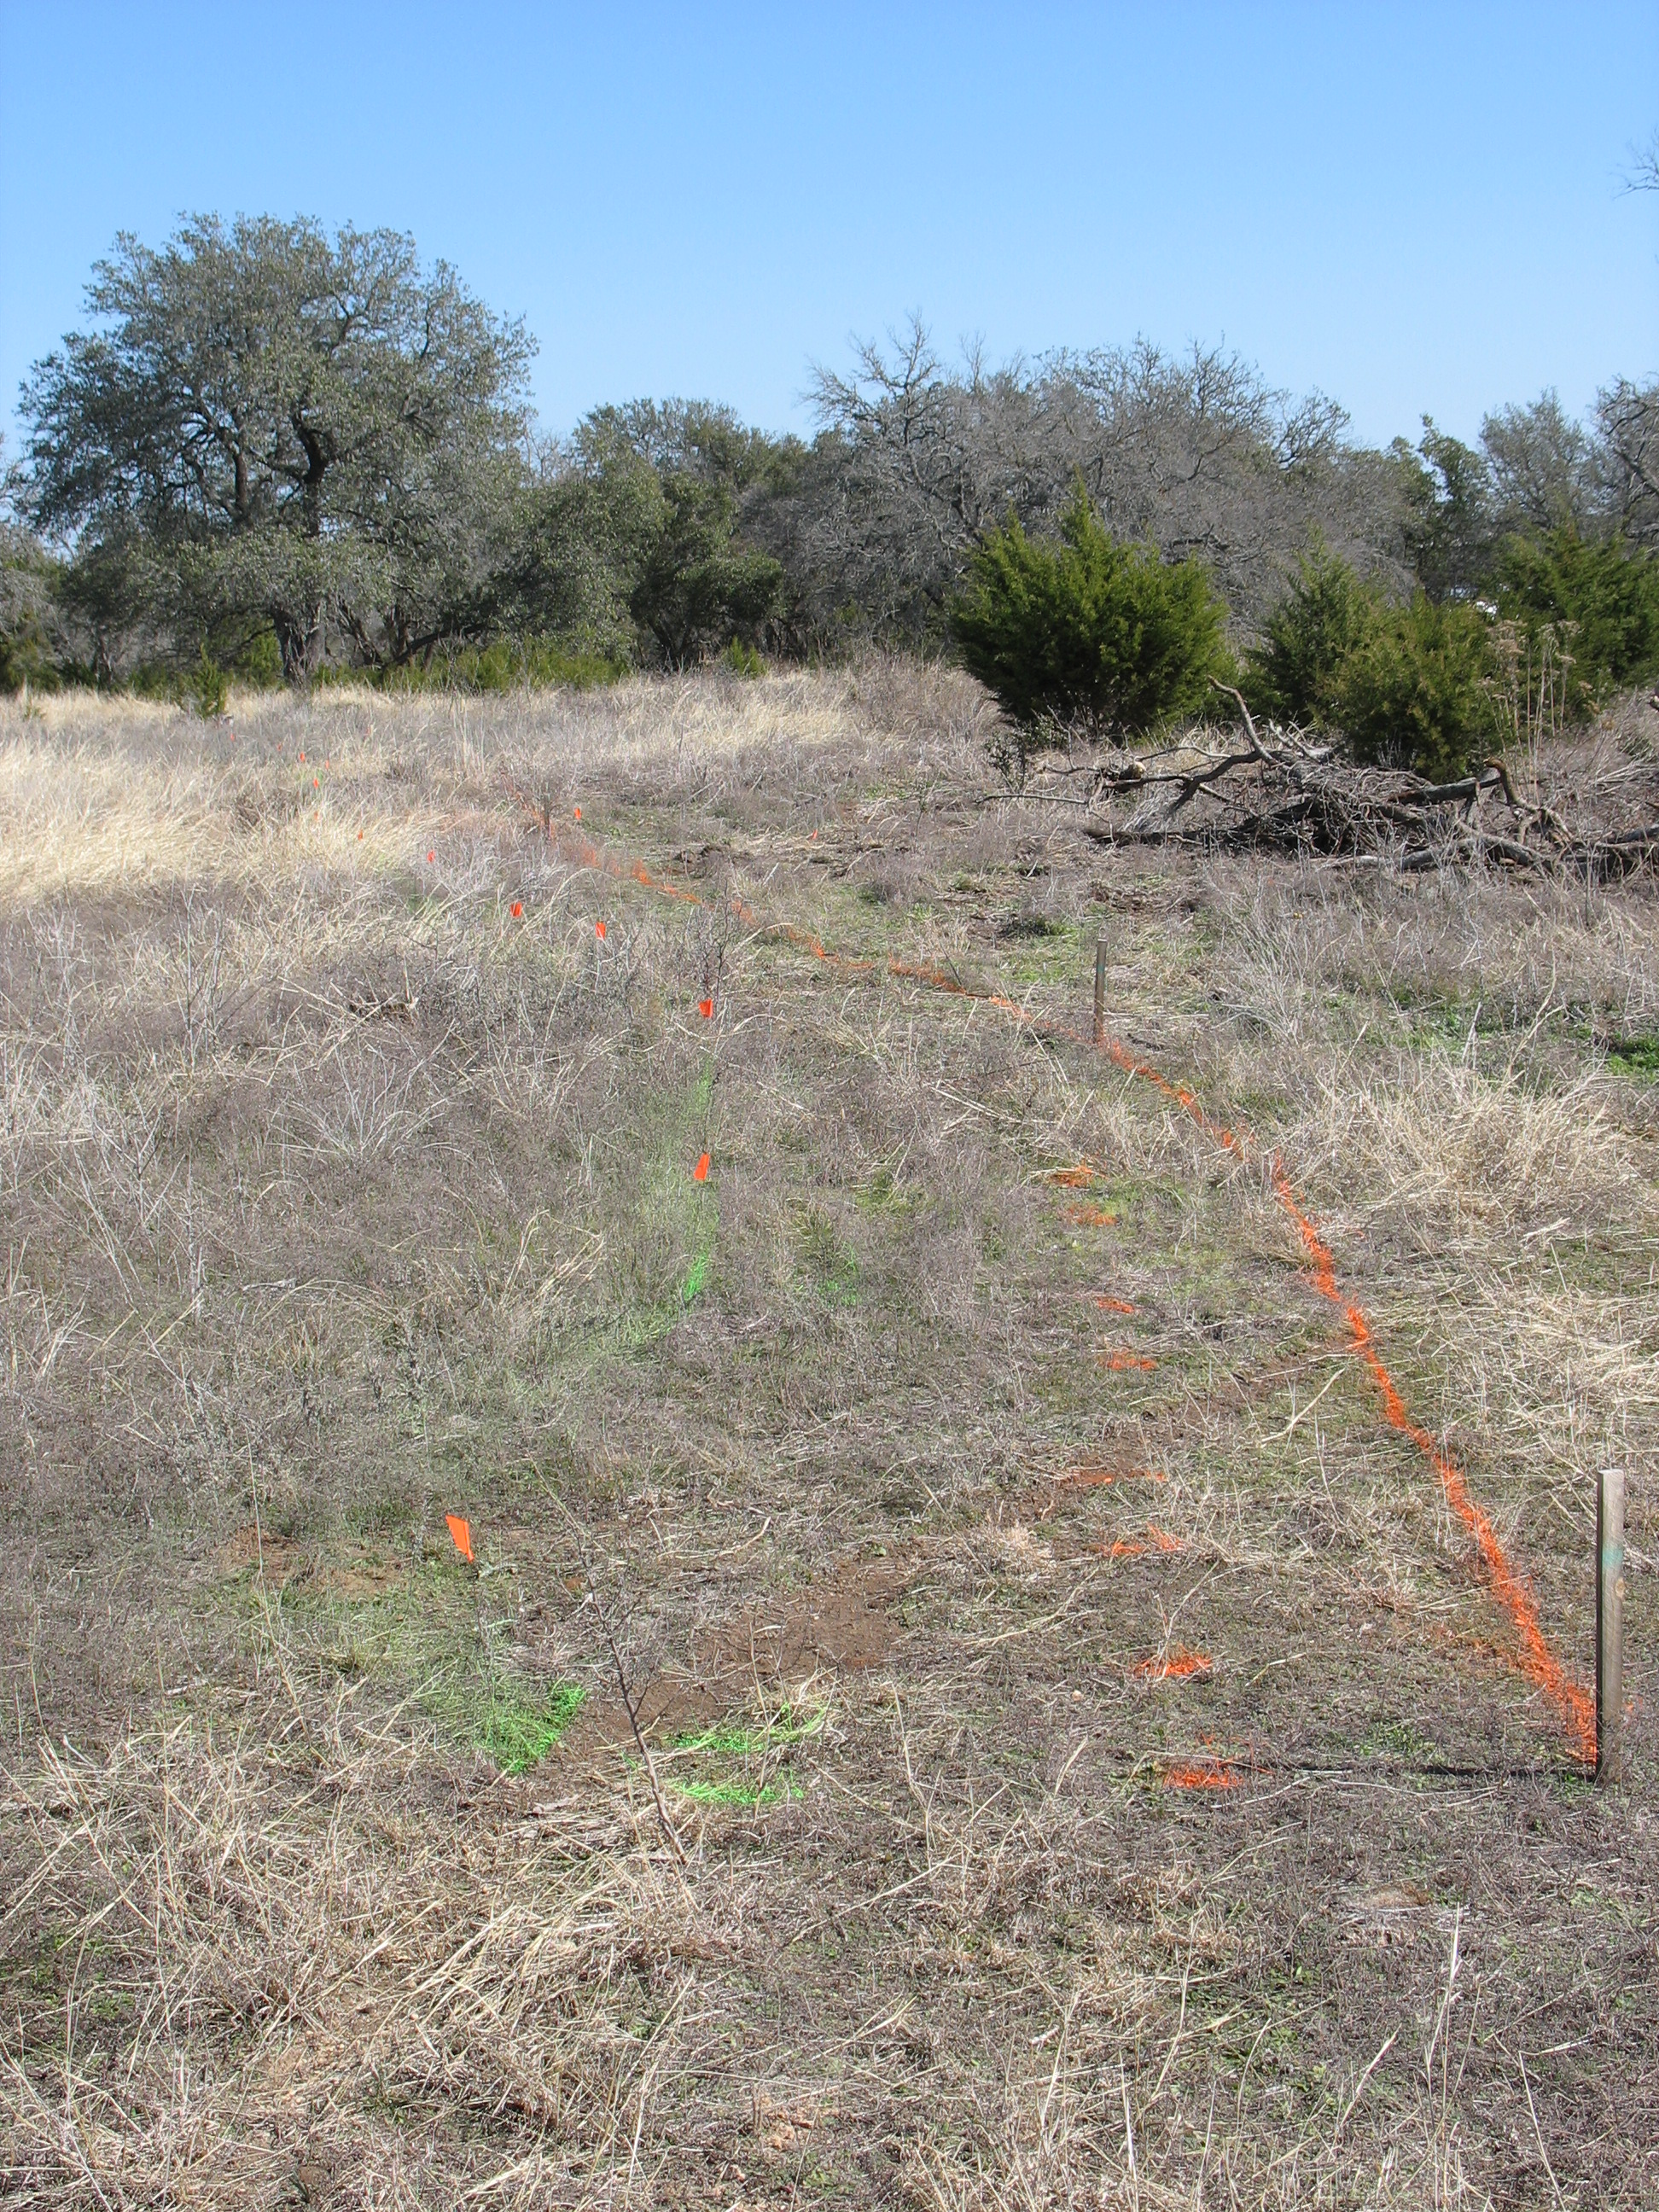
The orange line on the right is the downhill side.  The green line on the left side with the flags is my end point on the back cut.  Four feet to the left of the solid orange line are green spray marks every 10 ft. or so.  I used these green marks to denote end of the swale base and the start of the back cut.  I started the machine at the very top end of this picture and ran it backwards up the bottom end of this picture.  I will explain why in later on.

Swale 1b

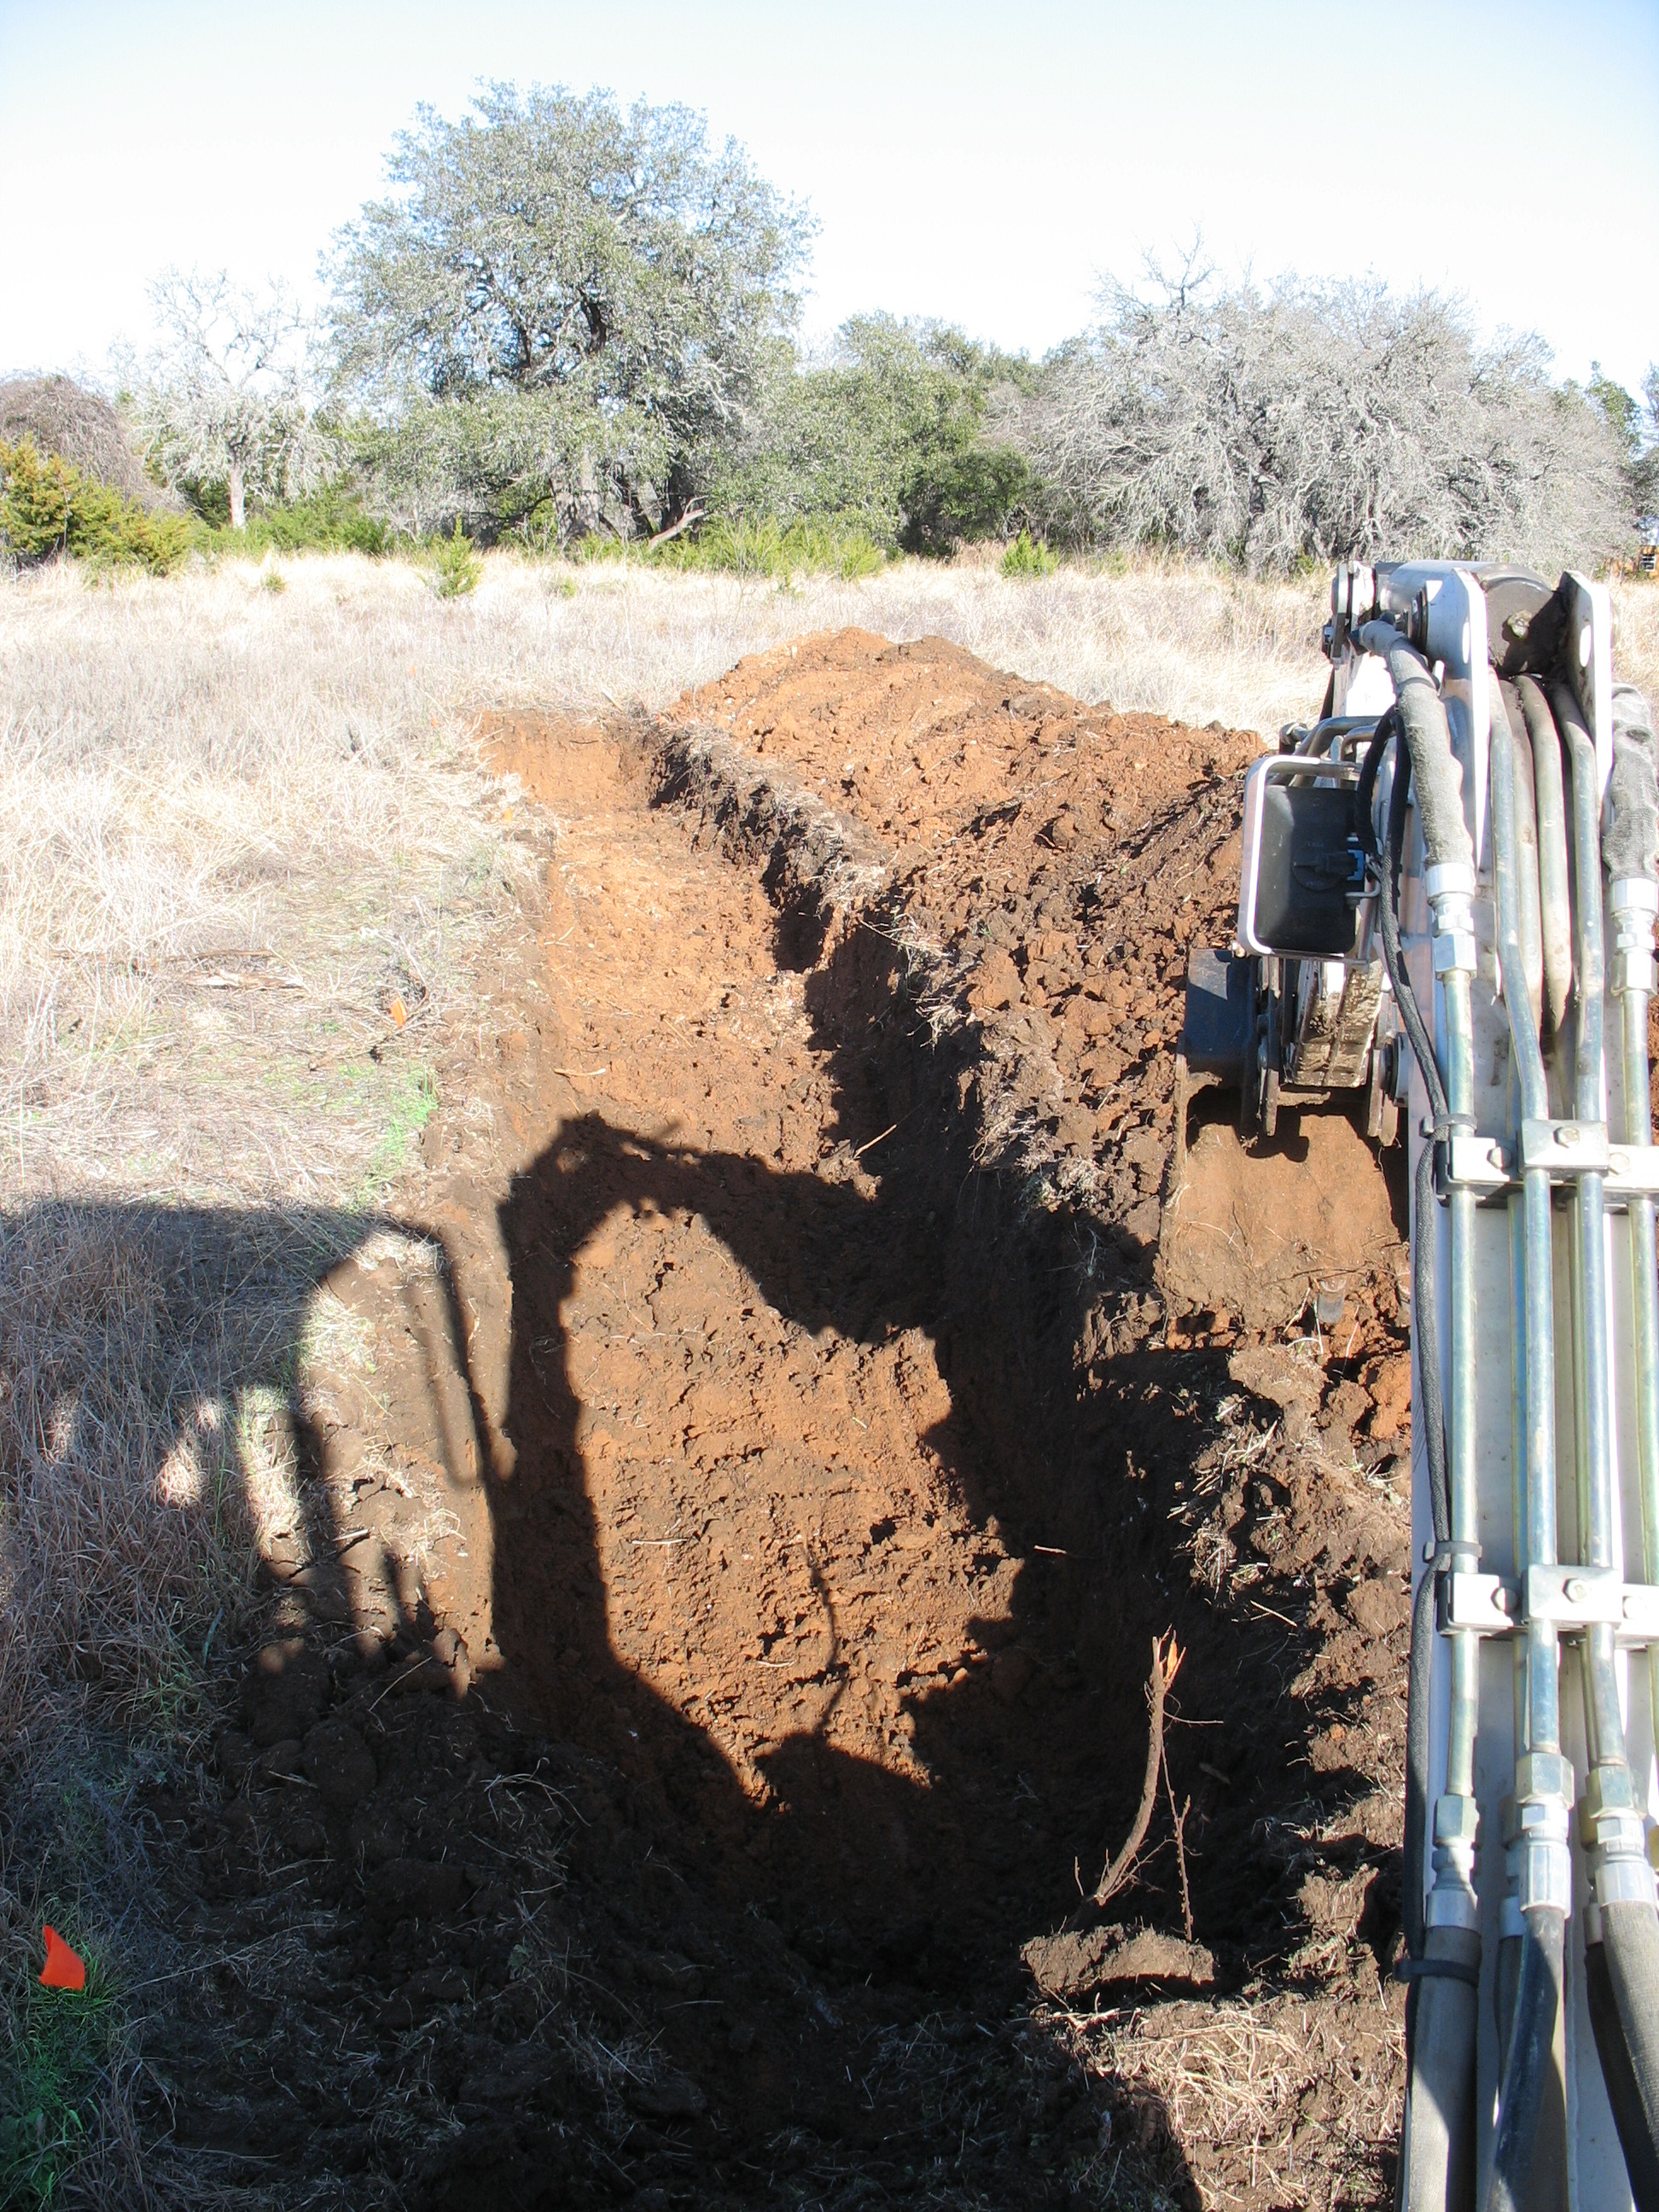
This picture is from a view inside the excavator.  I am about 40% done with the base at this point.  The material removed is placed on the right.  This will form the berm.  You can see that I am working backwards from the “end” of the swale.  I could have started from the opposite direction, but I would have had the sun in my face during the whole project.  Take that in consideration when you are beginning a project like this.  In this picture you can see the bucket of the excavator.  It has teeth on it.  I wasn’t too sure of the composition of the soil at this place on my property.  This was my second time using an excavator on my property and I ran into shallow soil my first dig.  I didn’t run into any stone at all here, so I could have gotten away with a smooth bucket.  I was so thankful when I discovered I had up to 9 inches of topsoil and beautiful red sandy loam sub-soil.  I went a total of 3ft. down.  The base of the swale is about 4ft. wide here.  The excavator was about 4.5ft. wide.  So I was able to use the excavator as a point of reference on how wide to dig.

Swale 1c

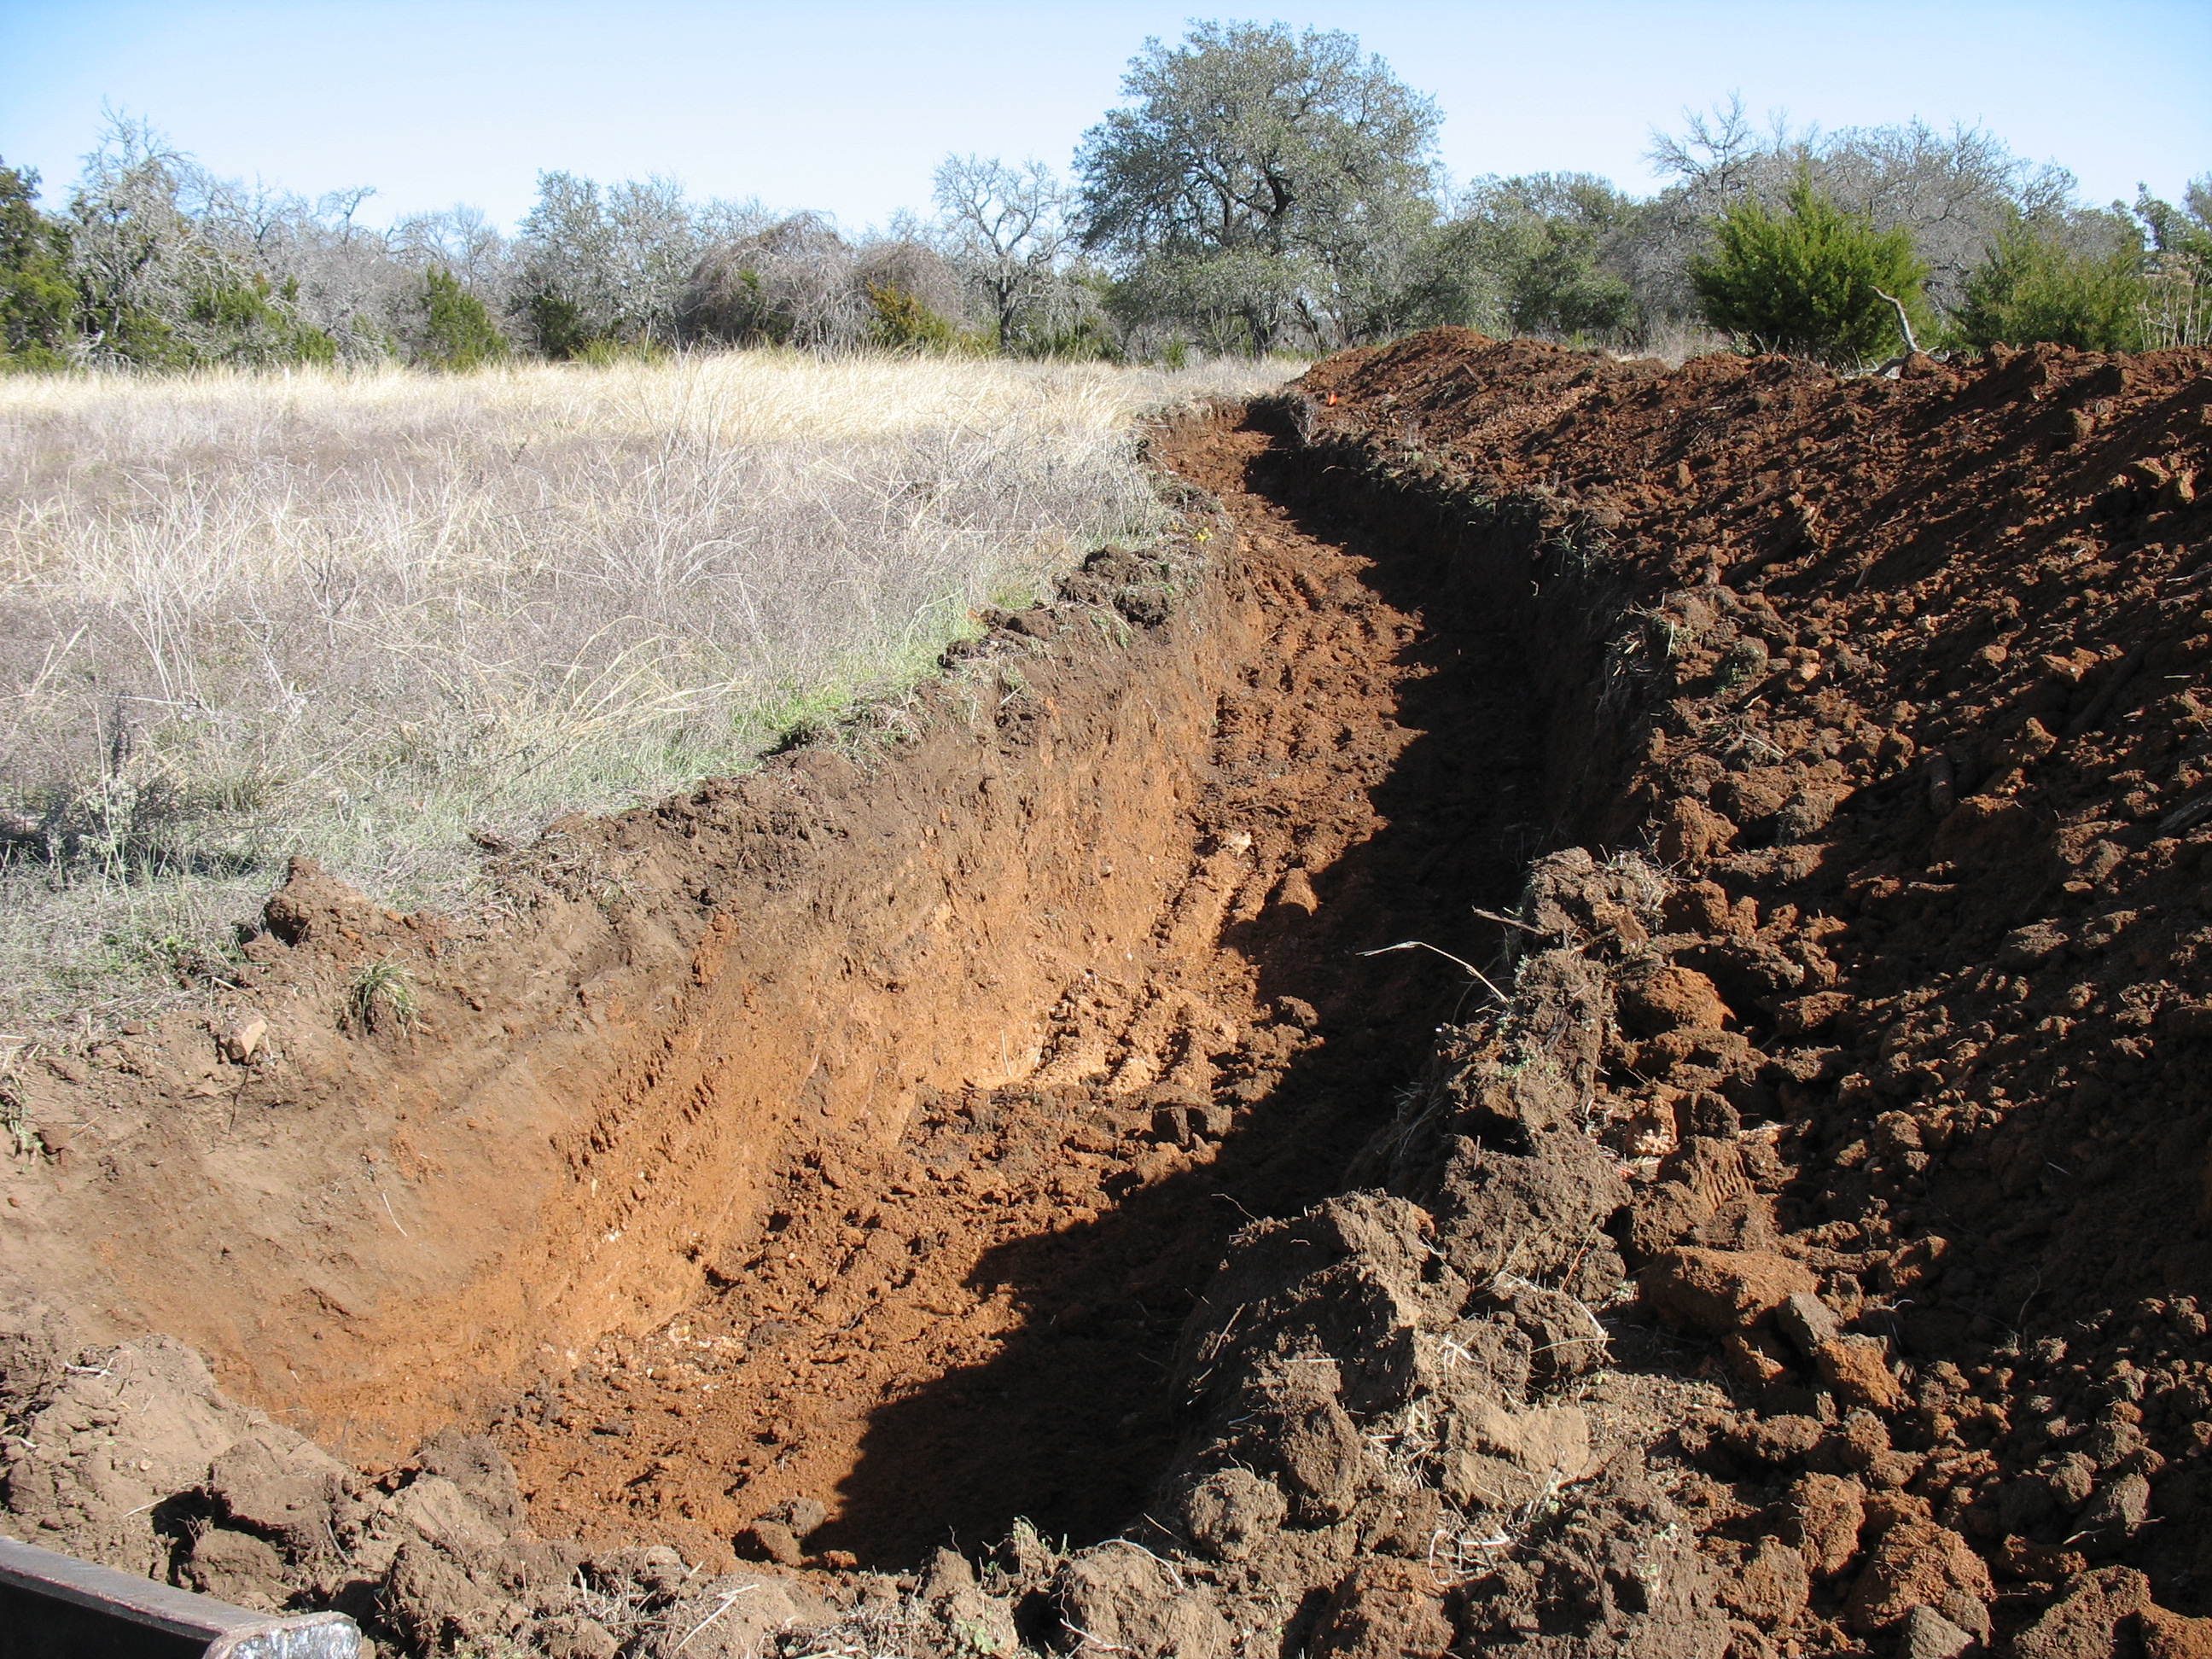
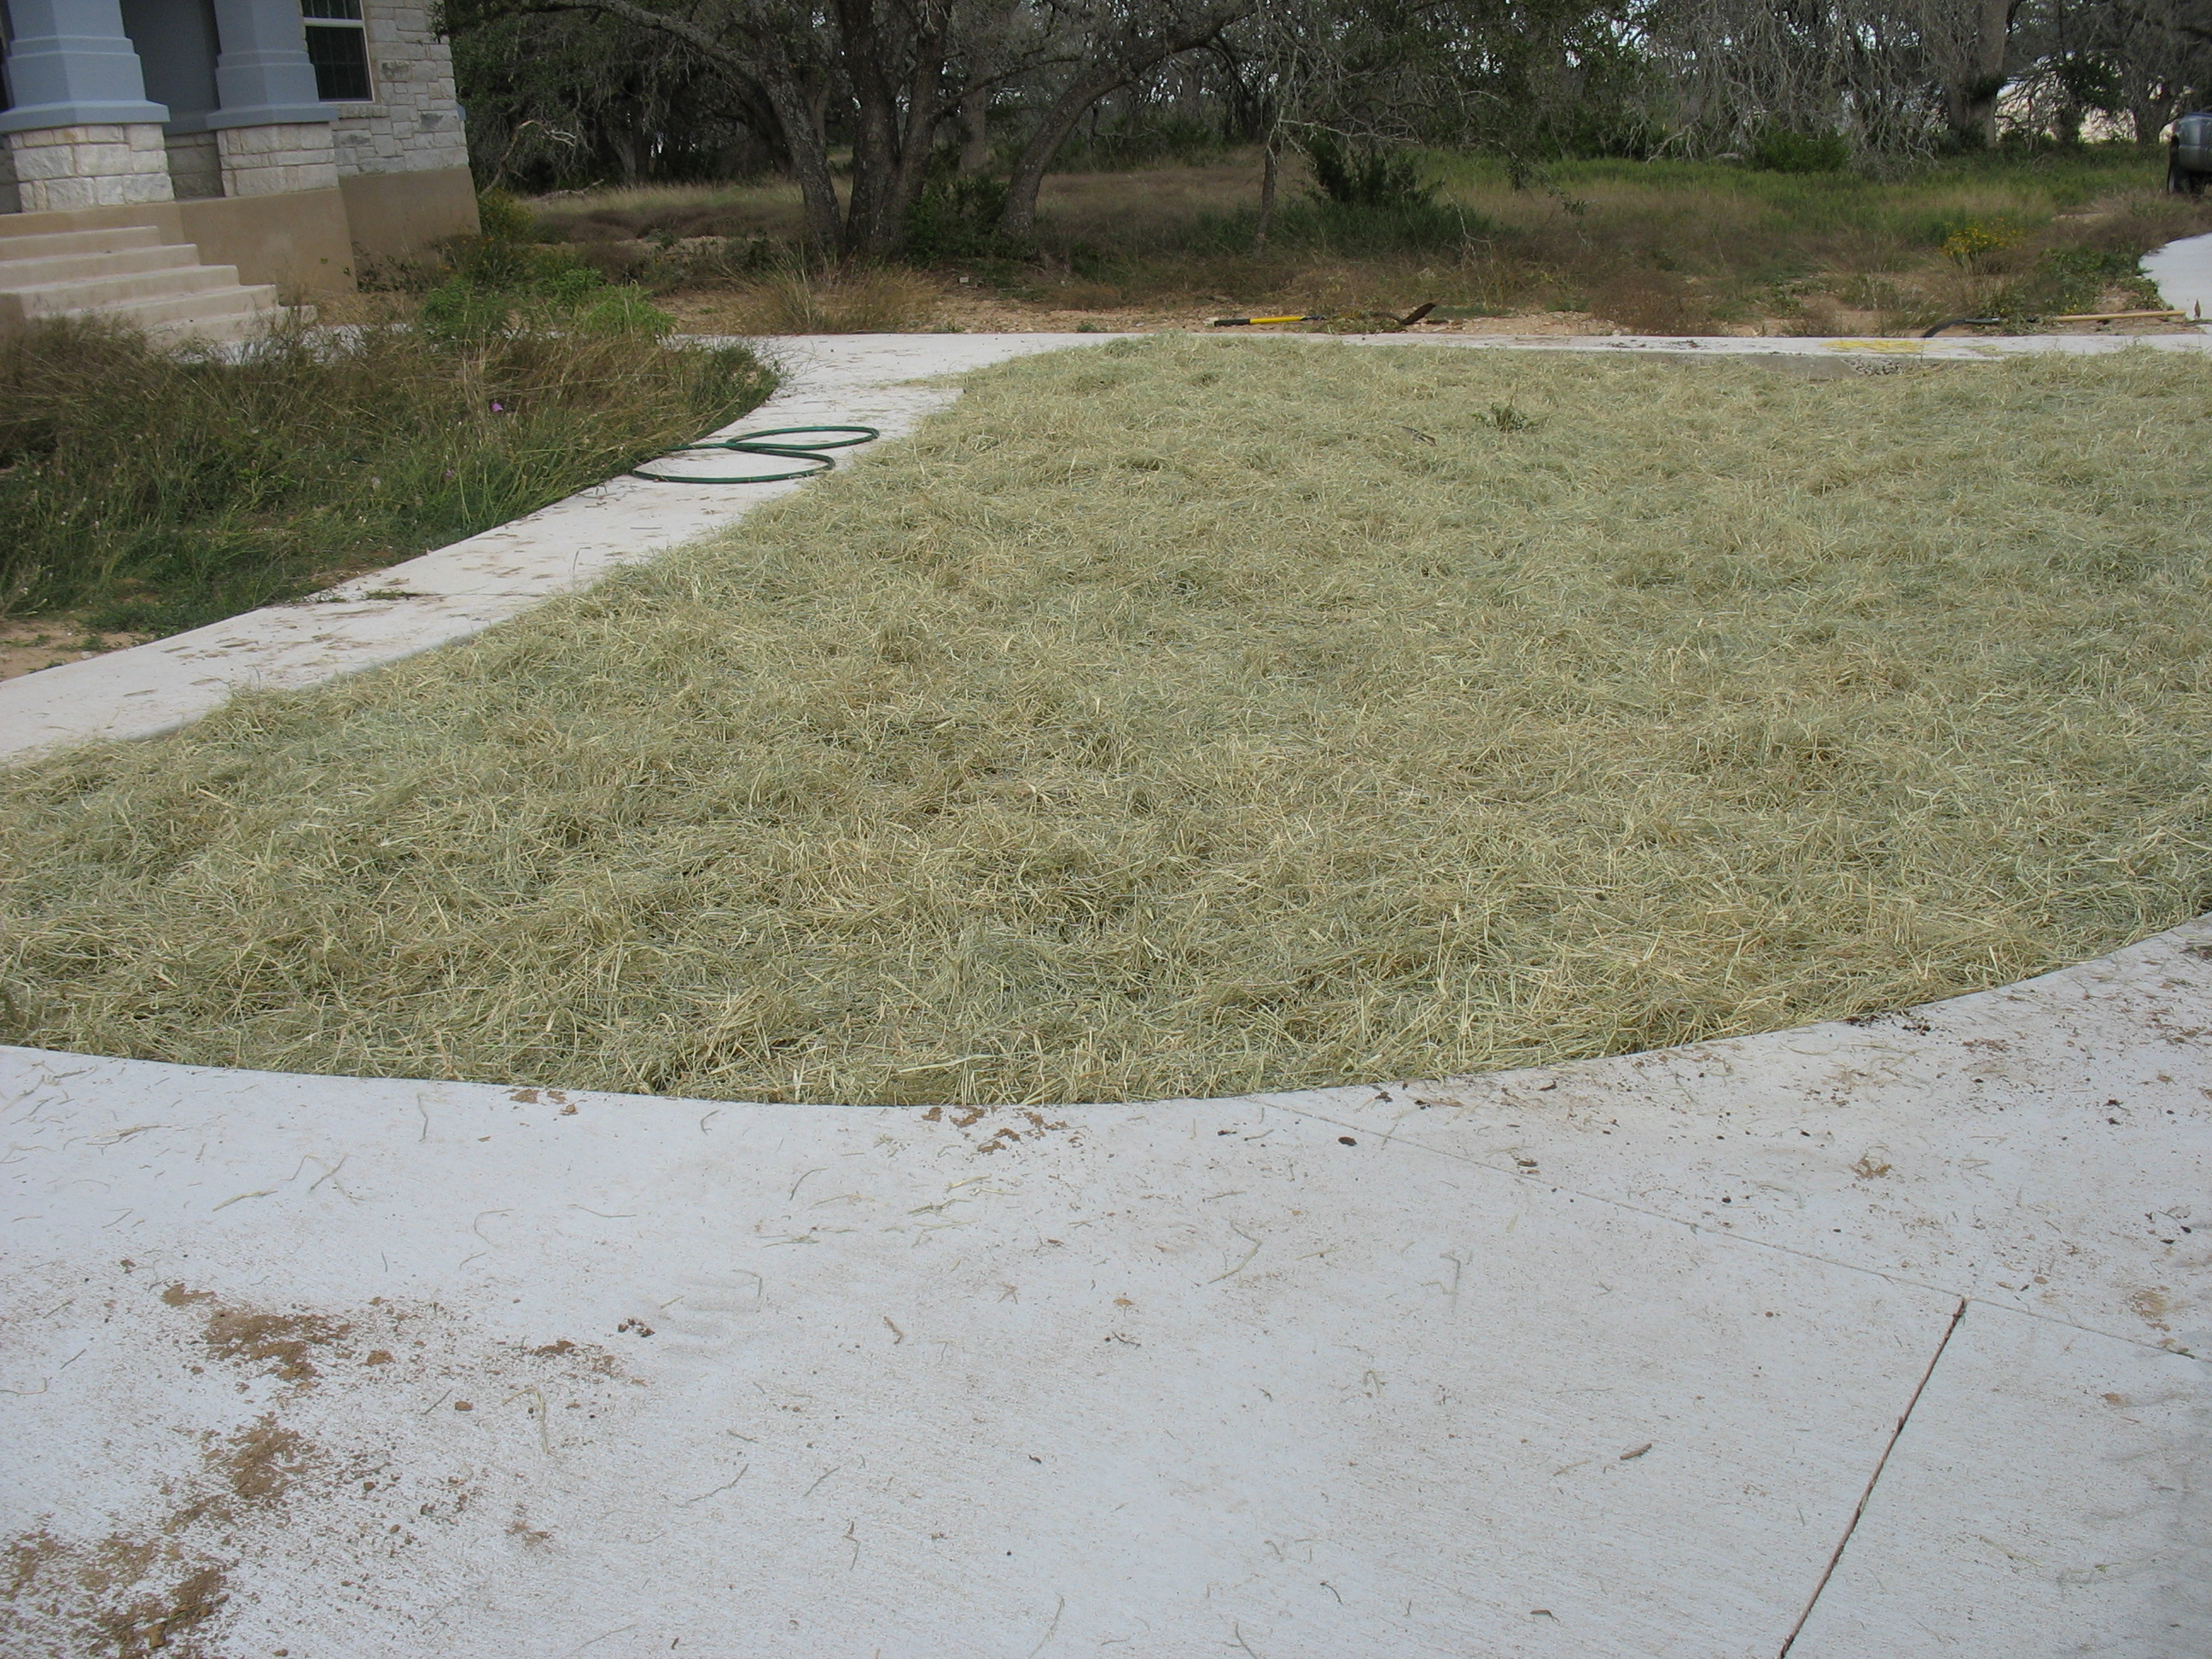
This picture shows the base completed with the berm on the downhill side.  This picture gives a good representation of how much dirt was removed.  After I completed the back cut, I reshaped the berm.  I should have done a better job of getting the berm closer to the edge of the base.  You can see almost and 18″ gap between the berm and the edge here.  You can also see how the teeth on the bucket left ruts in the ground.  I would have benefited from a smooth bottom bucket.  Come to find out the facility where I rented the excavator didn’t have one.  Use what you can get.  The next step is to add the back cut.  I started at the opposite end of the bottom of this picture.

Swale 1d

I am about 40% along the length of the swale in this picture.  I was able to articulate the excavator at this point to apply a gentle slope to the back cut.  I was also able to extract the topsoil from the sub-soil and put them in separate piles.  I tried to do the same thing with the topsoil and sub-soil while digging the base, but the reach on the machine wouldn’t allow me to make two separate piles on the berm.  You can see the piles from the back cut in the top left hand.  This picture shows the scale of the machine to the job.  I should have got a much larger machine, but I didn’t have the room on the downhill side to maneuver it.  There is a brush pile in the way.  Ideally you would want a machine to travel along the downhill side.  You would want enough reach on the machine to dig the base and the back cut and put the material right in front of you as that would be the berm.  You would save a huge amount of time.  There was no way that mini-excavator could do that.  The way I did it was a compromise between what machine was available, the time I had and my budget for the job.  Since I did the work I had the whole weekend to do the job.

Swale 1e

This picture shows the completed swale.  From here I need to smooth out the berm.  I brought it closer to the edge of the base cut and leveled off the top.  As I leveled the top I pulled that material more towards the down hill side.  The base of the swale and the back cut also need to be smoothed out, but that is a lower priority to caring for the berm.  The berm needs to be cover cropped and mulched before the next rain.  Try your best to keep from stepping on the berm as much as possible since the soil is not compacted.  I will post another post on my cover cropped and mulched berm.  I am also posting this link to the comments section of http://www.thesurvivalpodcast.com/calls-1-31-14#comments  Jack Spirko is my inspiration for getting into permaculture.  The first topic of discussion in that episode was swale construction.  I hope this post helps to answer some questions.

I also wanted to note that the mini-excavator is a very powerful machine.  I used it to separate the brush pile I had and knock some limbs off a large dead tree too.  While you have it for the day there are some other duties it can perform.  Please make sure that you are properly instructed on the use of any machine you buy or rent.  At any point where you feel fatigued or you find yourself being sloppy in your work, take a break!  Just a little time off the machine to get a snack, take a nap or even just get out of the sun for a little bit can help you get focused.  Remember a machine like this is destructive and capable of tipping.  Be safe.


1 Comment

Berkeley Composting Method

I learned this method when I took my Online Permaculture Design Course.  This is an 18 day composting method.  When composting you want to strive for a 20:1 to a 25:1 of carbon to nitrogen mix to your final ingredients.  Your “browns” are dead plant matter and represent your carbon input.  Your “greens” are your still living or freshly cultivated plant matter, this includes: lawn trimmings, vegetable and fruit scraps as well as coffee grinds and herbivore manure.  Here is the recipe and the procedure:

Recipe:  1/3 manure preferably cow,  1/3 browns and 1/3 green.  Building a pile 3ft tall by 3ft wide.  Optional:  Add an activator.

Procedure:

Step 1: You will start by laying down two beds of sticks.  I know some people that use pallets too.  I used a bed of bushy dead shrubs.  The purpose of laying down this layer is to encourage aeration on the bottom of the pile.  We do not want anaerobic decomposition.  If you see a white powdery substance in your pile this is an indicator of anaerobic decomposition.  Your base of the pile should be about 3ft in diameter.

Step 2:  Put down a layer of browns.

Step 3:  Put down a layer of manure.

Step 4:  Put down a layer of browns.

Step 5:  Put down a layer of greens.

Step 6:  Repeat steps 2 to 5 until your pile is 1.5 ft tall.

Step 7:  This is where we add an activator if possible.  This can be a small animal or a mass of nettles/veggie scraps.  This is an optional step and not necessary.  It just helps to fire up the process and ensure that we have an 18 day process.  In my case I used some bull nettle from my yard.

Step 8:  Complete steps 2 to 5 until your pile is 3 ft. tall.  Water your pile until water comes from the base of the pile.

Step 9:  Place sticks around the upper portion of the pile.

Step 10:  Place a tarp over your pile and anchor it down with rocks or any of heavy item you have.  I used a 6’x8′ tarp and found this to be too small.  I would recommend at least 8’x8′.  The sticks keep the tarp from touching the pile and prevent anaerobic decomposition.

Next we will map out the day to day procedure on turning the pile.

Day 1:  Pile creation.  Take your tarp off and water the pile as needed.  If you got your pile too wet you can use the handle end of your manure fork or shovel to poke a couple of holes in the top of the pile to help dry it out.  Always recover the pile with your tarp.  I water my pile every other day.

Day 2 and 3:  Leave the pile under the tarp.  Water as needed.

Day 4:  Turn the pile.  This is where owning a manure fork comes in handy.  A manure fork is like a pitchfork, but has 7 to 10 spikes.  You will exert less energy using a manure fork.  Just stick it in the top of your pile and start taking layers off.  Flip it over on your other layer of sticks, pallet or whatever base you have.  You will be turning the pile every two days, hence the need for two bases.  Build the pile like you did before  3 ft. wide by 3 ft. tall.

Day 6, 8, 10, 12, 14, 16:  Repeat the turning process, duplicating what you did on day 4.

Day 18:  You should have a usable pile of compost.

Here is a website for a compost calculator: http://www.klickitatcounty.org/SolidWaste/fileshtml/organics/compostCalc.htm

I used the calculator and found that I was going to have compost that will be a 20:1 carbon to nitrogen.  That is some pretty “hot” compost and would be best suited cut with fill soil or regular topsoil.

Day 1: Compost pile construction.

Day 1a

In this picture, greens are added to a layer of browns.  There are coffee grinds and crushed egg shells in the green layer.

Day 1b

In this picture, a layer of manure is added after a layer of browns. The pile is getting up to 1.5 ft. tall.  Next step to add an activator.

Day 1e

Bull nettle will be my activator.  Bull nettle is a dynamic accumulator.  It’s very presence in my yard indicates a soil deficiency.  Bull nettle occupies that space because it can “mine” nutrients and minerals that nothing else at this point can.  Therefore, it is full of nutrients and minerals and its decomposition will enrich the compost.

Day 1c

I cut the seed heads off.  Sometimes a compost pile will get so hot that it will cook seeds.  I didn’t want to take that chance.

Day 1f

After another layer of browns I added the bull nettle to the middle of the pile.  I also added additional crushed egg shells.

Day 1g

Continue building your pile up.  I finished with some fill dirt nearby to weigh the pile down.  At this point the pile is just over 3 ft. high.  Now you will water the pile taking care not to spray water too hard on it and making the pile fall over.  I usually spray a  fine mist over the whole pile and then put the hose into the pile until water accumulates at the base of the pile.  You don’t want to over saturate or under saturate.

Day 1h

The next step after this one is to cover it with a tarp.  In this step we put sticks to keep the tarp from touching too much of the pile.  Increasing air flow under the tarp ensures aerobic decomposition.

Day 1i

Cover with a tarp and weigh it down.  As you can see a 6 x 8 ft. tarp is too small.

Day 4: Turn the pile.

Day 4a

You can see the decomposition taking hold on day 4.

Day 4b

Another shot from day 4.  You can see some decomposition on the edges of the manure.  Make sure that when you turn your pile that you make an attempt to mix the layers a little bit.

Day 4c

Another photo from day 4.  Put your sticks back in the top after you turn the pile.

Day 6:  Turn the pile.

Day 6

A little bit different shot of  manure with a brown layer from day 6.

Day 6 flour

This picture is of a different pile that I started at the same time.  This pile will be specifically for trees and shrubs.  I added a handful of flour each time that I turned the pile.  Flour is food for beneficial fungus.  Trees benefit greatly from fungal interactions in the soil.  It is a necessary function of fungus to exchange starch from the tree for nutrients in the soil.

Day 8:  Turn the pile.

Day 8

You start to see some really good decomposition on day 8.  The pile is darker.  I had to turn the pile at night when I got home so the flash kicked in.

Day 10:  Turn the pile.  No picture on day 10.  I was outside in the pouring rain turning the pile and I didn’t want the rain to damage the camera.  I will have a photo for day 12 since I am actually posting this on day 12 and I will be turning the pile today.

UPDATE 11-24-13

Day 12:  Turn the pile.  I turned the pile.  It was 35 F  outside and raining.

Day 12

The flash obscures the rich dark color, but seen here is the bull nettle less the leaves.  This should continue to break down over the next few days.

Update 2-2-14

Shame on me for not completing this post, but on day 14 we were starting to get some freezing temperatures.

Day 14:  Turn the pile.

Day 14

Day 16:  Turn the pile.

Day 16

Decomposition had really slowed down at this point.  The temperature kept dancing around 33F to 35F degrees.  It was rainy too, so the pile kept moist.

Day 18: Turn the pile.

Day 18

You can see here that the pile had almost completely froze.  I will try again in the spring time.  I will work another series of pictures and post again.


Leave a comment

Sheet Mulching

Sheet Mulching is a process used to build soil, add fertility and/or limit erosion.  It can also be thought of as an aggressive form of “composting in place”.

I have a part in my front yard that is subject to water saturation and erosion during rain events.  This is because I have an eve on my roof that drains directly at this area.  It is enclosed on all sides by a concrete driveway as well as a sidewalk.  The area was full of fill dirt that was placed there after the house was built.  I would like to deal with my erosion problem and the fact that it was full of local grasses and weeds.  Eventually I will plant of couple of fruit bearing trees a sort of mini food forest, but for now I am going to plant it with sweet potatoes.  Its a little late in the year to plant sweet potatoes, but I am hoping to get at least a 100 days before the frost hits and get some form of a yield.

The process of sheet mulching and the layers in it make a lot of sense once you see it.  I actually suggested this process to one of my vendors at work that had issues with his septic leach field retaining too much moisture.  There are several layers that can absorb moisture as well as retain it.  This is the process:

Step 1):  Clear the area of as much vegetation as you can without exerting too much energy.  You will see why in step 2.  In this step you will need to aerate the soil.  You can do this with a pitch fork by stabbing the ground and moving the fork in a circular fashion.  For larger scale projects you may need an aerator that attaches to the rear of a tractor.  Water profusely.

Step 2):  Lay down a layer of veggie scraps or if there was overgrowth that you removed in step 1 you can substitute that.  You could simply leave the existing vegetation in place or lay it over by stepping on it.  I had sparse growth so I extracted it and spread it out as much as I could since I didn’t have veggie scraps. Water again.

Step 3):  Lay down a layer of cardboard up to 6 inches thick.  You can layer the cardboard against the flow of water to limit erosion or layer it with the flow of water if you want to encourage speeding it up.  Water again.

Sheet mulch diagram

Step 4):  Lay down of at least 3 inches of compost, preferably 6 to 8 inches.  Water again.

Step 5):  Lay down a layer of shredded woody mulch or preferably straw.  Water again.

Step 6):  Lay down another layer of 3 inches of compost.  You can do a little more, but it’s not necessary.

Step 7):  Top off with a layer of straw.

That’s pretty much it.  In the area of my property I skipped step 6 and 7 due to the fact that it would exceed the height of the area.  Remember there are no hard rules in Permaculture.  Take this as a guide.  If you didn’t have access to compost, you could use fill dirt.  If you didn’t have access to straw or woody mulch, you could use tree leaves.  This is set up will eventually turn into dirt as it composts itself.

Sheet 1

My project before starting.

Sheet 2

Step 1: Remove vegetation and aerate.

Sheet 3

Step 2: Layer of green vegetation.  I didn’t have veggie scraps

Sheet 4

Step 3: Layer of cardboard.  It may be hard to see, but I arranged the cardboard in layers to limit erosion.

Sheet 5

Step 4: Layer of compost.  I bought 4 x 40lb. bags of cow manure/compost and it still wasn’t enough to do this area.  I had to use my entire onsite compost pile.

Sheet 6

Step 5: Layer of straw or hay in this case.  It was all that was available at this time from the local hardware store.  The area to the left will be next after this.  I planted sweet potatoes last night and the whole area looked great.

This was a great workout as well.  Enjoy implementing this process where you feel it will benefit you.


Leave a comment

Earthworks Course

On October 24 to 27th, 2013 I attended Nick Ferguson’s Earthworks Course at his home in Louisiana.  Nick’s website is http://www.permacultureclassroom.com.  The main instructor for the course was Nicholas Burtner with Jack Spirko and Nick Ferguson guest instructing.  Nicholas’ site is http://www.workingwithnature.org and Jack’s site is http://www.thesurvivalpodcast.com.  As I stated in earlier posts, Jack was my inspiration for getting into permaculture.  This would be my second event taught by Nicholas Burtner.

It was a long drive to get from Austin to Louisiana.  It was 350 miles and took 6.5 hours.  We had two and a half days of instruction followed by a half day of design ending with receipt of a certification.  I had gone to the Urban Design workshop the previous week and it was good to see a couple of people from that workshop able to make it down to this one.

The instruction was top notch.  Even thought the town we were in was really small, it had a really nice library with a small conference room.  We split up our instruction time between the library and the garden at Nick’s place.  I got some additional review from my PDC as well as enjoying some new material and some of Nicholas’ experiences.  I really think the real life stories are the best part of the instruction.  You know you have a good teacher when they can tell stories that relate to the topic of discussion.

There were about 15 students from all walks of life.  Jack made it in on the second day of instruction.  The food was amazing and I really have to take my hat off to Nick’s wife and her sister for preparing the meals and putting up with all these people at their home.  We lit some paper lanterns Friday night and I ended up leaving Saturday night to try and take the edge off my work load for being gone for almost two weeks.  I did miss the additional time allotted in the garden for the digging of ponds and swales on Sunday.  I understood the principles enough to feel comfortable leaving early.  I was glad to be home with a day to spare.  I was also very happy to receive my Earthworks Course certificate.

Image

A chicken got too close to Nicholas in the garden…

Image


Leave a comment

Urban Permaculture Design Course

On October 15th to 20th, 2013 I attended an Urban Permacuture Design Course at Jack Spirko’s property.  Jack Spirko is my inspiration to get into permaculture.  Jack’s website is http://www.thesurvivalpodcast.com.  The teacher for the course was Nicholas Burtner.  Nicholas’ website is http://www.workingwithnature.org.  This was the second time I visited Jack’s homestead.  The first time was back in May of 2013 for a “woody bed” workshop.  The purpose of the urban workshop was to take a portion of Jack’s homestead and use it to simulate the limited spaces available to design in an urban or suburban landscape.  Placing confines or limitations on a design made this a challenging and enjoyable experience.

We spent two days of lecture followed by a day to design.  The lecture was a relaxed atmosphere with teaching that really engaged the audience.  I enjoyed material that reviewed what I learned in my PDC as well as new material and experiences unique to Nicholas.  At the end of the design day we presented our designs.  We learned how to present a design in a professional manner that required us to use our skills to communicate with Jack and Nicholas role-played as customers.

A true testament to Nicholas as a teacher was his ability to recognize that his students had to learn a lot of material in a short amount of time.  There were also about 8 of us that completed a PDC and the other students would have been overwhelmed individually.  Since there were over 30 people he had us break into groups of 5 to 6.  This allowed us to pool our creative resources and come up with some really unique designs.  The best part of the whole course was watching the amazing ideas produced by each group.  Every design had one or two elements that stood out from the rest.  A truly memorable experience with good food, good people and good fun.  I also got to meet Jack’s intern Josiah Wallingford.  It wouldn’t have been a successful event without Dorothy Spirko, Jack’s wife.

I was happy to have earned my certification.

Image


2 Comments

An Introduction

Thank you for visiting my site.

My name is Kalon Kalman, but I go by KC.  I made this site to follow my permaculture journey.  I first learned about permaculture from Jack Spirko with http://www.thesurvivalpodcast.com.  Jack has a solutions based podcast that teaches people to be self-reliant.  Jack partnered with Geoff Lawton to teach an online PDC (Permaculture Design Course).  I took the online PDC In May 2013 and completed it at the end of September 2013.  I was very excited to receive my certification mid-October 2013.

Image

I live just north of Austin on a 5 acre homestead.  I first purchased the land in February 2012.  In September 2012 I started to build the house and it was completed in April 2013.  After I moved in I started to tame the land.  The landscape was very damaged from overgrazing and burn piles.  After receiving my certification I felt confident in applying this knowledge in designing and repairing my property.  This website will serve as a log to chronicle my experiences.

In gaining my certification as a Permaculture Design Consultant, I now have the knowledge to help other people.  I can now design properties into abundance.  Imagine the freedom enjoyed by people able to grow their own food.