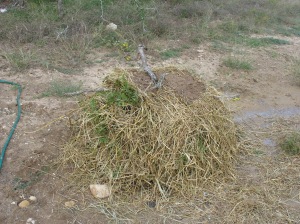
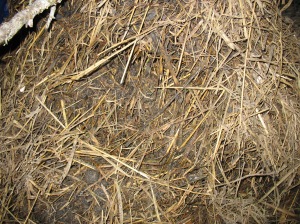
I learned this method when I took my Online Permaculture Design Course. This is an 18 day composting method. When composting you want to strive for a 20:1 to a 25:1 of carbon to nitrogen mix to your final ingredients. Your “browns” are dead plant matter and represent your carbon input. Your “greens” are your still living or freshly cultivated plant matter, this includes: lawn trimmings, vegetable and fruit scraps as well as coffee grinds and herbivore manure. Here is the recipe and the procedure:
Recipe: 1/3 manure preferably cow, 1/3 browns and 1/3 green. Building a pile 3ft tall by 3ft wide. Optional: Add an activator.
Procedure:
Step 1: You will start by laying down two beds of sticks. I know some people that use pallets too. I used a bed of bushy dead shrubs. The purpose of laying down this layer is to encourage aeration on the bottom of the pile. We do not want anaerobic decomposition. If you see a white powdery substance in your pile this is an indicator of anaerobic decomposition. Your base of the pile should be about 3ft in diameter.
Step 2: Put down a layer of browns.
Step 3: Put down a layer of manure.
Step 4: Put down a layer of browns.
Step 5: Put down a layer of greens.
Step 6: Repeat steps 2 to 5 until your pile is 1.5 ft tall.
Step 7: This is where we add an activator if possible. This can be a small animal or a mass of nettles/veggie scraps. This is an optional step and not necessary. It just helps to fire up the process and ensure that we have an 18 day process. In my case I used some bull nettle from my yard.
Step 8: Complete steps 2 to 5 until your pile is 3 ft. tall. Water your pile until water comes from the base of the pile.
Step 9: Place sticks around the upper portion of the pile.
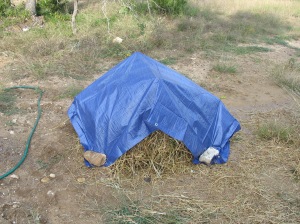
Step 10: Place a tarp over your pile and anchor it down with rocks or any of heavy item you have. I used a 6’x8′ tarp and found this to be too small. I would recommend at least 8’x8′. The sticks keep the tarp from touching the pile and prevent anaerobic decomposition.
Next we will map out the day to day procedure on turning the pile.
Day 1: Pile creation. Take your tarp off and water the pile as needed. If you got your pile too wet you can use the handle end of your manure fork or shovel to poke a couple of holes in the top of the pile to help dry it out. Always recover the pile with your tarp. I water my pile every other day.
Day 2 and 3: Leave the pile under the tarp. Water as needed.
Day 4: Turn the pile. This is where owning a manure fork comes in handy. A manure fork is like a pitchfork, but has 7 to 10 spikes. You will exert less energy using a manure fork. Just stick it in the top of your pile and start taking layers off. Flip it over on your other layer of sticks, pallet or whatever base you have. You will be turning the pile every two days, hence the need for two bases. Build the pile like you did before 3 ft. wide by 3 ft. tall.
Day 6, 8, 10, 12, 14, 16: Repeat the turning process, duplicating what you did on day 4.
Day 18: You should have a usable pile of compost.
Here is a website for a compost calculator: http://www.klickitatcounty.org/SolidWaste/fileshtml/organics/compostCalc.htm
I used the calculator and found that I was going to have compost that will be a 20:1 carbon to nitrogen. That is some pretty “hot” compost and would be best suited cut with fill soil or regular topsoil.
Day 1: Compost pile construction.
In this picture, greens are added to a layer of browns. There are coffee grinds and crushed egg shells in the green layer.
In this picture, a layer of manure is added after a layer of browns. The pile is getting up to 1.5 ft. tall. Next step to add an activator.
Bull nettle will be my activator. Bull nettle is a dynamic accumulator. It’s very presence in my yard indicates a soil deficiency. Bull nettle occupies that space because it can “mine” nutrients and minerals that nothing else at this point can. Therefore, it is full of nutrients and minerals and its decomposition will enrich the compost.
I cut the seed heads off. Sometimes a compost pile will get so hot that it will cook seeds. I didn’t want to take that chance.
After another layer of browns I added the bull nettle to the middle of the pile. I also added additional crushed egg shells.
Continue building your pile up. I finished with some fill dirt nearby to weigh the pile down. At this point the pile is just over 3 ft. high. Now you will water the pile taking care not to spray water too hard on it and making the pile fall over. I usually spray a fine mist over the whole pile and then put the hose into the pile until water accumulates at the base of the pile. You don’t want to over saturate or under saturate.
The next step after this one is to cover it with a tarp. In this step we put sticks to keep the tarp from touching too much of the pile. Increasing air flow under the tarp ensures aerobic decomposition.
Cover with a tarp and weigh it down. As you can see a 6 x 8 ft. tarp is too small.
Day 4: Turn the pile.
You can see the decomposition taking hold on day 4.
Another shot from day 4. You can see some decomposition on the edges of the manure. Make sure that when you turn your pile that you make an attempt to mix the layers a little bit.
Another photo from day 4. Put your sticks back in the top after you turn the pile.
Day 6: Turn the pile.
A little bit different shot of manure with a brown layer from day 6.
This picture is of a different pile that I started at the same time. This pile will be specifically for trees and shrubs. I added a handful of flour each time that I turned the pile. Flour is food for beneficial fungus. Trees benefit greatly from fungal interactions in the soil. It is a necessary function of fungus to exchange starch from the tree for nutrients in the soil.
Day 8: Turn the pile.
You start to see some really good decomposition on day 8. The pile is darker. I had to turn the pile at night when I got home so the flash kicked in.
Day 10: Turn the pile. No picture on day 10. I was outside in the pouring rain turning the pile and I didn’t want the rain to damage the camera. I will have a photo for day 12 since I am actually posting this on day 12 and I will be turning the pile today.
UPDATE 11-24-13
Day 12: Turn the pile. I turned the pile. It was 35 F outside and raining.
The flash obscures the rich dark color, but seen here is the bull nettle less the leaves. This should continue to break down over the next few days.
Update 2-2-14
Shame on me for not completing this post, but on day 14 we were starting to get some freezing temperatures.
Day 14: Turn the pile.
Day 16: Turn the pile.
Decomposition had really slowed down at this point. The temperature kept dancing around 33F to 35F degrees. It was rainy too, so the pile kept moist.
Day 18: Turn the pile.
You can see here that the pile had almost completely froze. I will try again in the spring time. I will work another series of pictures and post again.


Pingback: Berkeley Composting Method Post Updated | Austin Permaculture